Add Your First Product
A step-by-step walkthrough of creating your first product in the Niblr admin — title, price, images, stock, and publishing it live to your storefront.
This walks you through adding your first product and publishing it to your storefront. It takes a couple of minutes.
In the admin, open Products in the sidebar and click Create New.
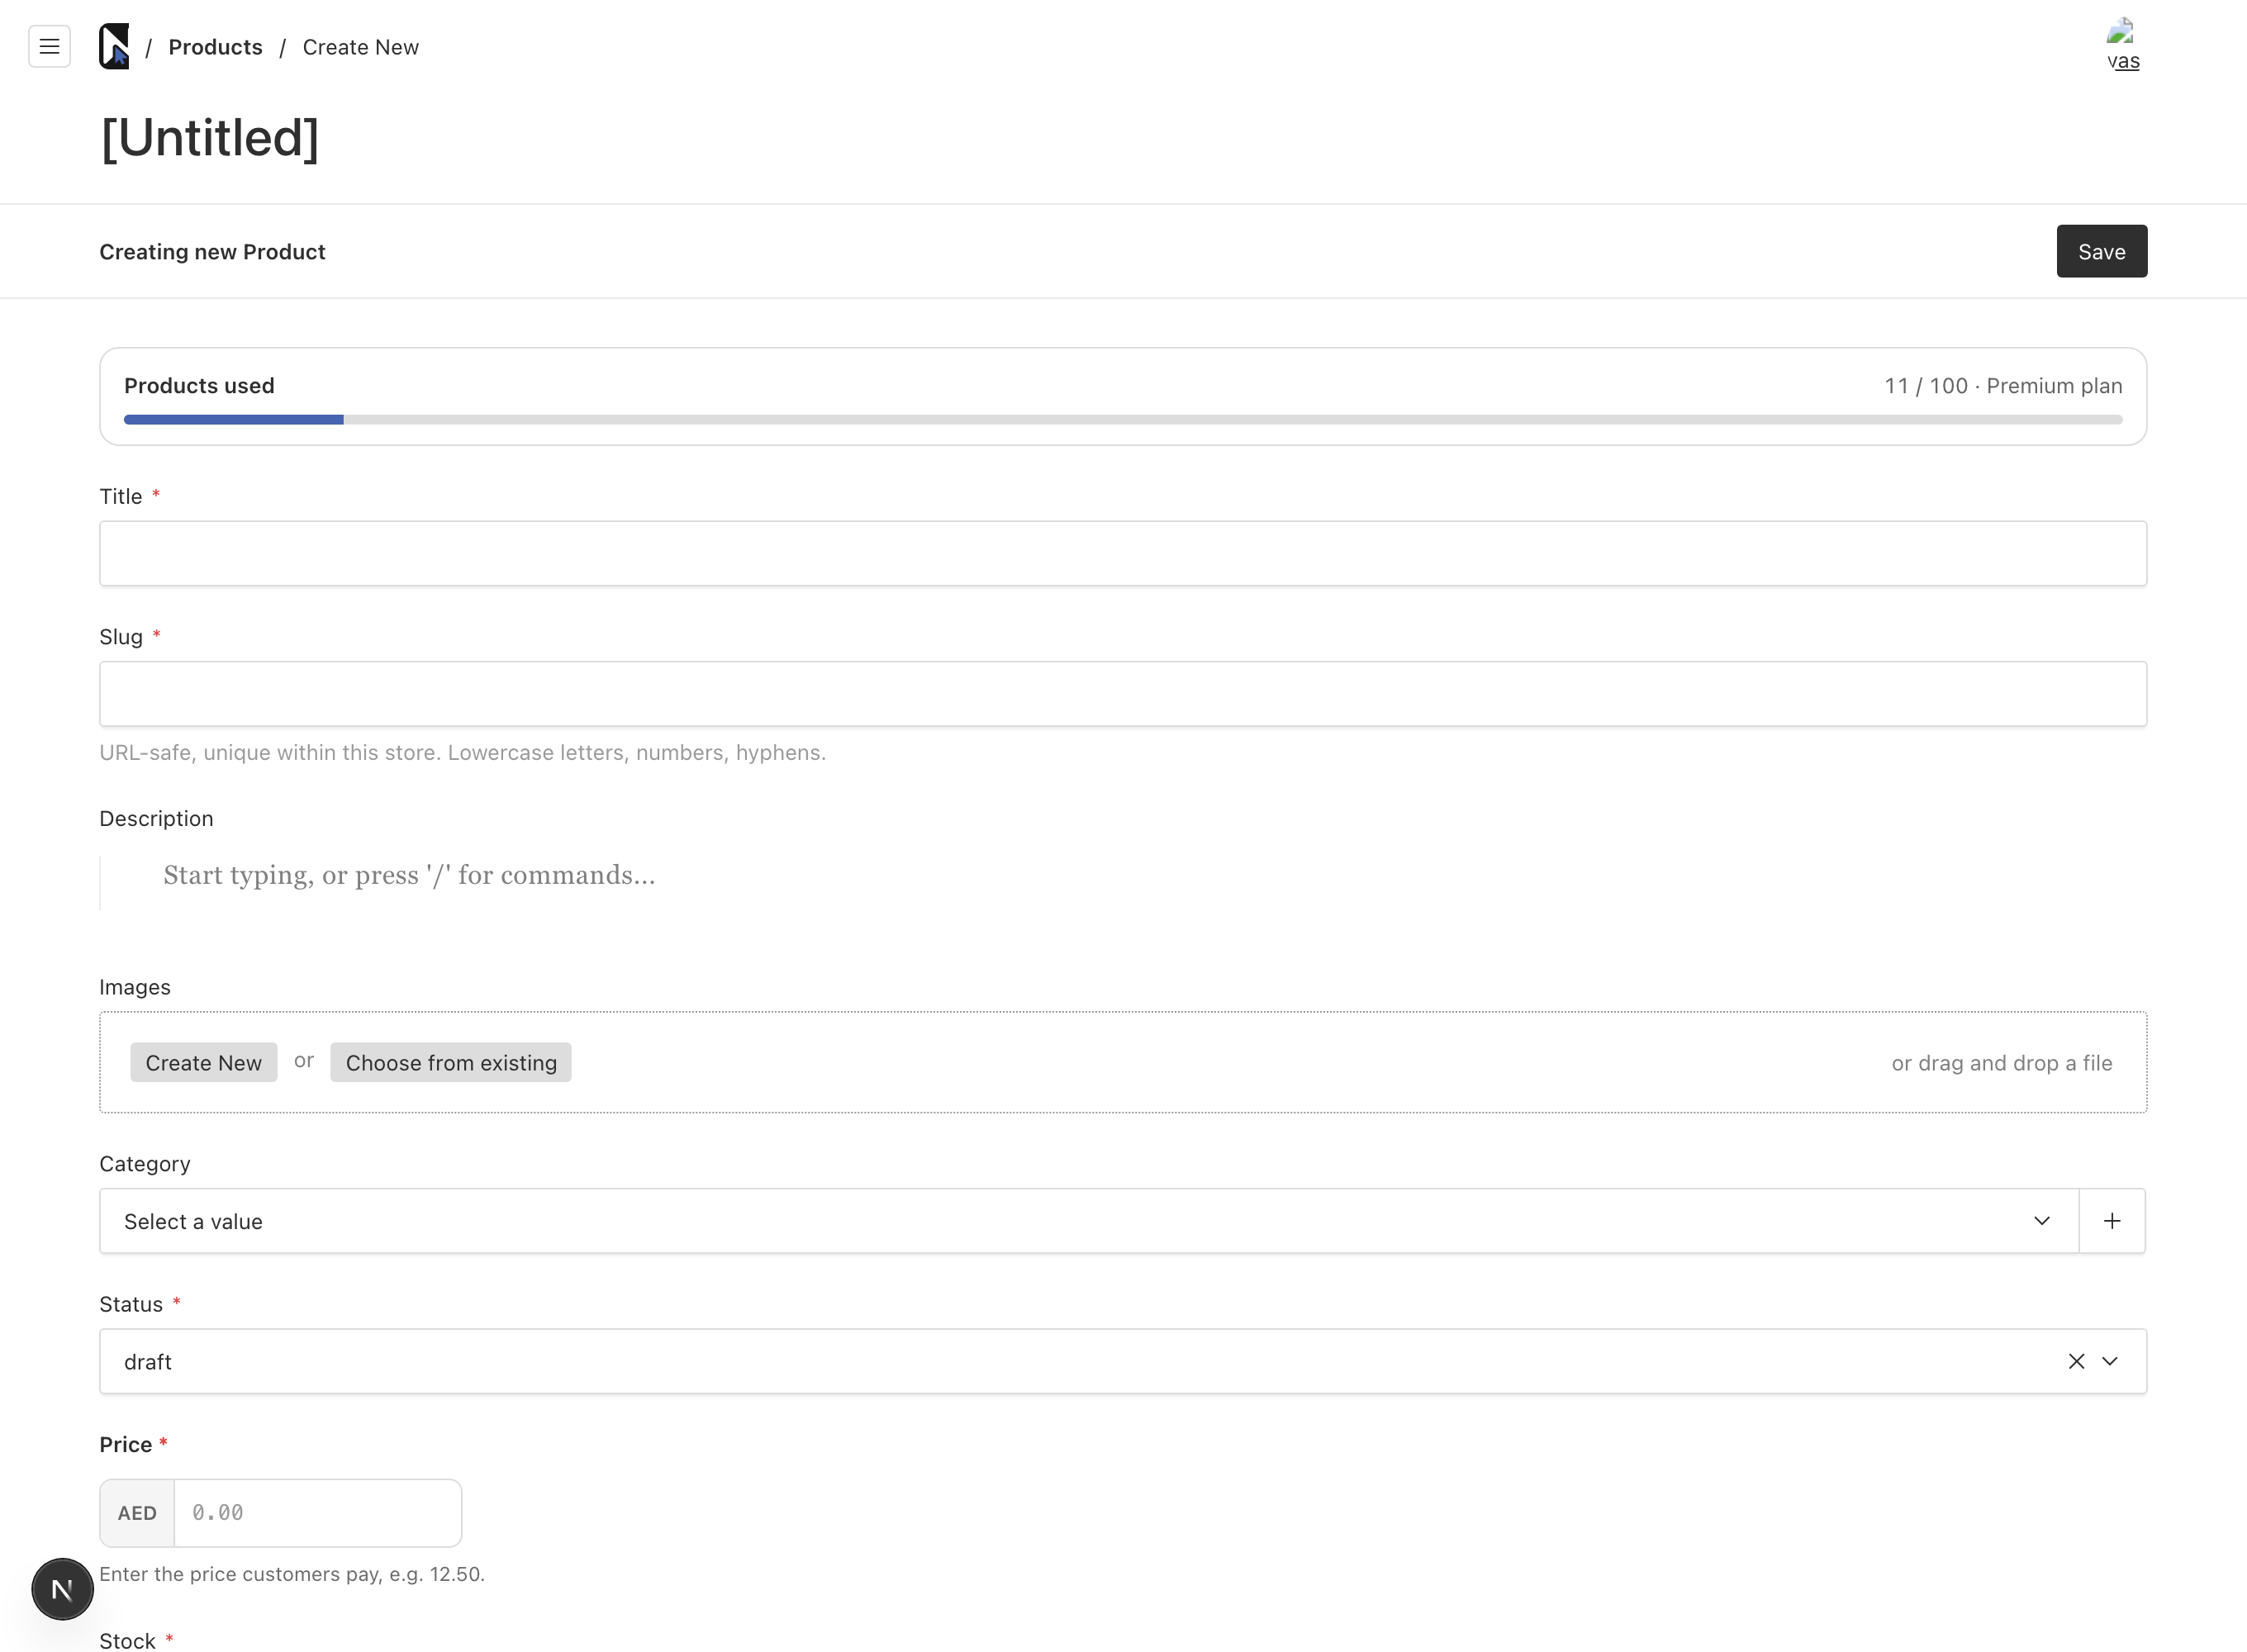
Fill in the product details
- Title (required) — the product name customers see, e.g. "Sourdough Loaf".
- Slug (required) — the URL-safe name used in the product's link (lowercase letters, numbers, hyphens). It's generated from the title; you can edit it.
- Description — a rich-text editor. Start typing, or press
/for formatting commands (headings, lists, etc.). - Images — click Create New to upload, or Choose from existing, or drag and drop a file. The first image is the main product photo.
- Category (optional) — pick an existing category, or click + to create one. Categories let customers filter your catalog.
- Price (required) — the amount customers pay, in your store's currency (e.g.
12.50). - Stock (required) — how many units are available.
Publish it
Set Status to active and click Save. active is what makes a product show up on your storefront and in search — leave it on draft while you're still editing and it stays hidden.
That's it — your product is live at your-store.niblr.store/products/<slug>, and it's included in your store's sitemap automatically.
On the hosted plan you have a product limit shown at the top of the form (e.g. "11 / 100"). If you're close to the cap, it's time to look at your plan.
Next: build a landing page for it — see create custom pages.